
When we talk about motion design and stunning realistic digital projects, one software immediately comes to mind: Cinema 4D. C4D is well known for its potential to create 3D projects pretty quickly and efficiently, allowing the designers to play with a wide range of modelling, deforming, simulating and material editing tools to achieve more and more interesting results on both still images and animations with a variety of rendering style options to make all sort of creatives happy.
Before we continue, check out our Cinema 4D Render farm if you need quick and easy rendering power on your next project. New signups get $50 worth of starting credit, and a team of 3D experts will help you with any questions you might have at any time of the day and any day of the week.
When it comes to creating outstanding renderings, what's essential, alongside high-quality modelling of the elements and characters, is setting the materials and the textures correctly to mimic as close as possible the materials of the natural world and their interaction with light.
To achieve the photorealism we are aiming for, believe it or not, the secret is to introduce minor imperfections in the scene and the textures of the objects. In the real world, nothing is perfect and flawless, materials always present some sort of detail due to production processes or treatments and usage, they have minor dents here and there on the surface or have consumed paint along the corners, these details make the object interact with light in a very specific way so while texturing our scene we should take all these elements into account.
A typical workflow while creating a 3D scene is to first create the general layout with a white or grey flat material, this way we can see all the elements and the composition for what they are without any distractions from materials, plus it saves time to work on the composition first. We will still be able to make adjustments afterwards.
Once the 3D modelling is complete, and the scene is set, it's time to go through the C4D texturing process. Depending on the result we have in mind another good step to take would be to test the light settings and effects, editing the position and intensity of the light sources if necessary. This practice helps to have a quick preview of the general mood of the scene, and, as before, we can come back and adjust and edit at any time.

Now it's time to apply some materials and textures.
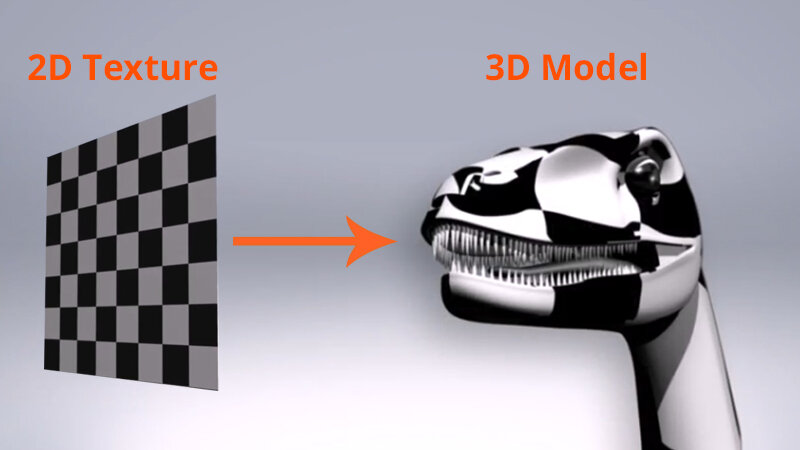
First of all, let's clarify what texturing means: texturing is the process of applying a 2D texture (that can be a photograph, a graphic pattern you created, an image of some specific details, etc.) to a 3D surface. In order to do so there are different techniques that we can use.
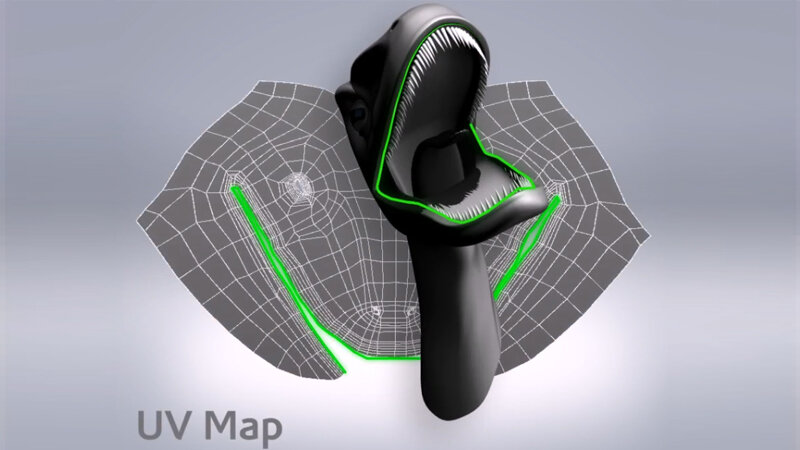
Probably the most popular one is UV mapping. UV mapping consists of a process of unwrapping the surface of our object. It helps to imagine our 3D object as origami, and the process of unwrapping is opening up the paper that creates our shape. Depending on the complexity of the shape, the map could be very complex. It might take a little while to figure out where to apply the seam lines, which is where inevitably, we have to “break” the shape to open and flatten the map. Seams are usually placed in hidden or less visible parts of the model. As we can imagine, this process requires some time and practice to achieve good results.
A second method to texture your 3D models is to use procedural materials. Many software programs, including Cinema 4D, 3ds Max, Maya and open-source software like Blender, offer this possibility.
C4D texturing can benefit from Cinema’s wide range of procedural materials, which means that the materials and textures are described using mathematical expressions and usually are visualized through nodes. The nodes are elements that perform a specific function in the equation that describes the material, from colour correction to camera distance, generating noises, gradients, patterns, flakes or scratches and more. They can be connected to each other, and their combination can create endless possibilities. Paired with an instant previewer, the user can always see how a specific node or group of nodes is affecting the material’s appearance.
Some nodes can be connected directly to an image of our creation or found on the internet. Some operate only if the image is in greyscale to apply the specific function they perform, like surface bumps or displacement, just to mention a couple. To create the greyscale version of our textures, or prepare some other map that we might need to make our materials as realistic as possible, Adobe Photoshop comes to our aid.
Another helpful open-source tool that we can use to create our textures and maps is Materialize. This handy software is a sort of Photoshop for material creation, and starting from a full-colour image allows the user to define a series of secondary maps that can significantly improve the quality of the materials in our 3D projects; plus, it comes with an instant previewer that immediately shows the material properties, making the editing and adjusting process incredibly easy and user friendly.


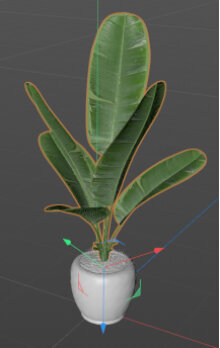
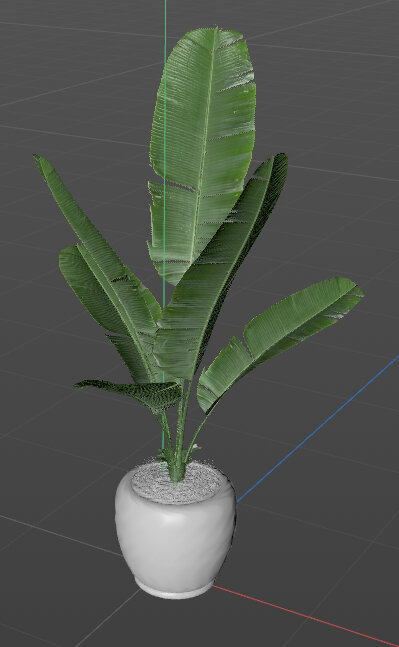
The above example shows the maps that I find more useful while texturing in Cinema 4D and that I think might produce good results. A good colour texture or image like the banana leaf above is a great starting point to get good final results in our renderings. In this case, to get the final result I aimed for, I used the bump map in greyscale to get the surface tridimensionality that every object in the real world possesses and final (but this could also be the first step) the mask that refines the geometry of the leaf and gives more realism to the model.


Notice how the colour texture is not enough to sufficiently describe the correct behaviour of the leaves in the banana plant model and how, despite the good quality of the image, the result is still flat and unappealing. Flagging the bump option in the material editor allows us to add the greyscale map we have and improve the quality of our material.
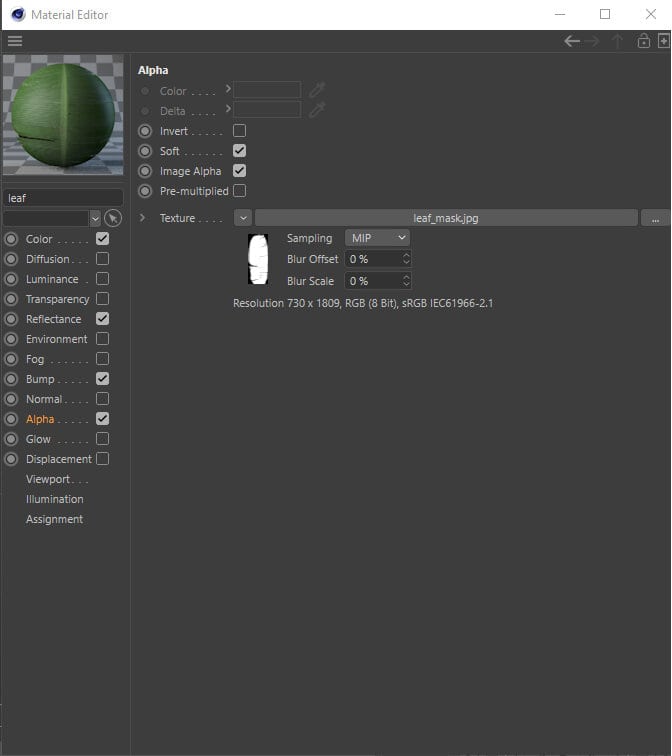
As we can notice, the shape of our leaves is still too regular and not very realistic. Sometimes to save time and optimize our workflow it's better to design a more straightforward shape and adjust it with the help of a mask map. Mask maps are black-and-white images that define what is going to be visible (white) and what is going to be “cut off” (black). Often in 3D software like Cinema 4D and Blender, this map must be uploaded in the material editor settings alpha channel.
Proceeding this way, we can achieve appealing results for all the composition’s materials and create stunning renderings. Keep in mind that every scene is unique, and according to the final result we want to achieve and the mood that we want to set, we should play with lights and colour settings accordingly. There is no preset formula to get a specific result, but this also means that the possibilities are endless, and the only limit is our creativity.


Happy rendering,
Sabrina Facchetti


